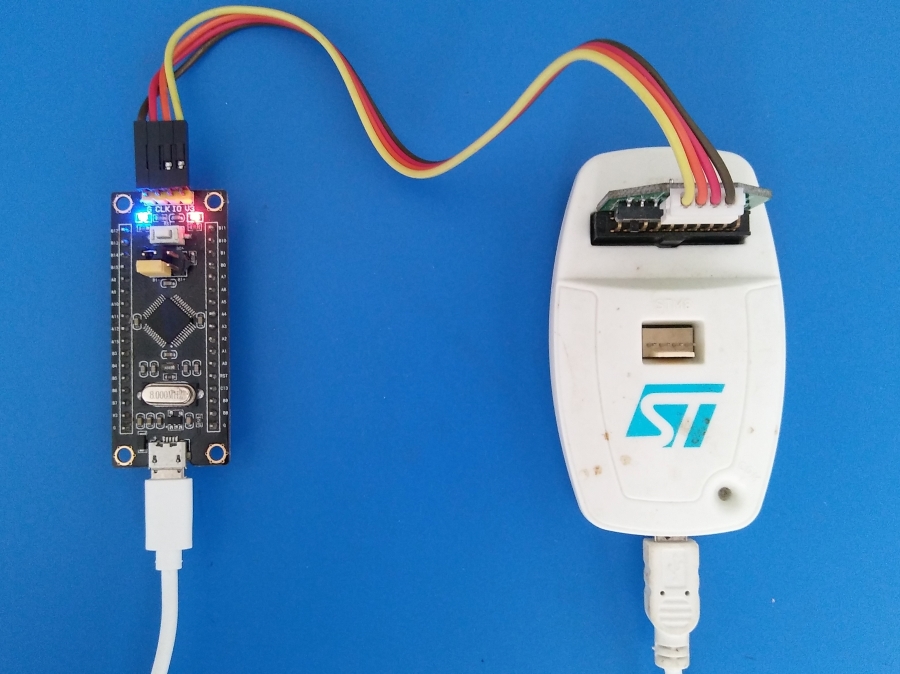
In this article I am going to describe how to implement Custom HID Device on STM32 MCUs. Human Interface Device (HID) is a USB class that is used for interfacing standard human interface devices like keyboard and mouse to computers. But it can be customized and used for any devices that need to communicate with a computer. So using this class in your projects, will make you able to communicate with your software through USB port, instead of serial ports or even USB virtual serial ports as it is not very attractive in modern applications.
I am using a Blackpill board with STM32F103C8T6 MCU and taking control of the LED on the board with a software written in C#. In the software, the state of the LED can be set as Off/On/Blink and send to the MCU plus a two-byte value as the blink interval. After sending these settings to the MCU, the MCU sends back a text data including received settings, and the software shows the text on a text box.
Create the project
Open STM32CubeMX and choose STM32F103C8 for the target MCU as it is the MCU on the Blackpill board.
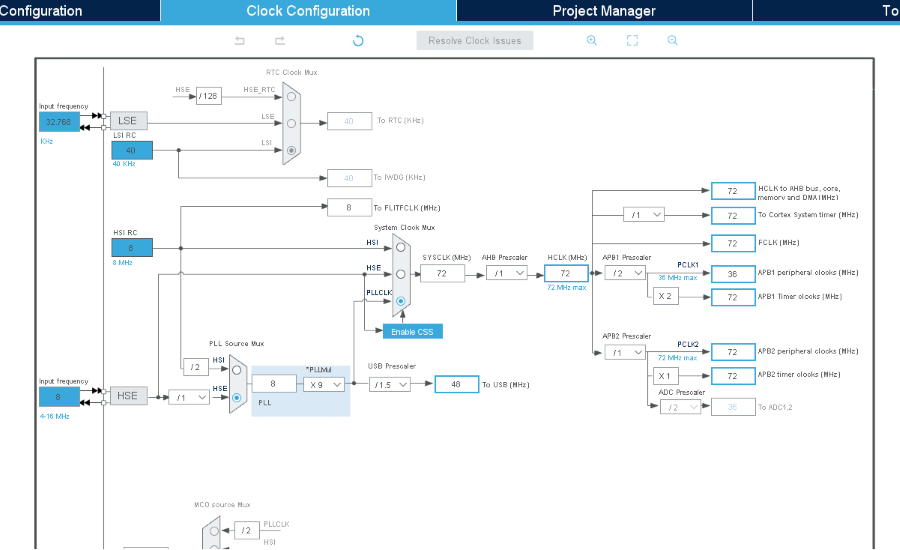
First thing to set, is the Crystal/Ceramic Resonator for High Speed Clock (HSE) in System Core -> RCC. Then go to Clock Configuration tab and configure the clocks as you wish. The important note in this section is the clock to USB, which must be set on 48MHz. Also note that the crystal on the Blackpill is 8MHz. The clock configuration I used is as follows.
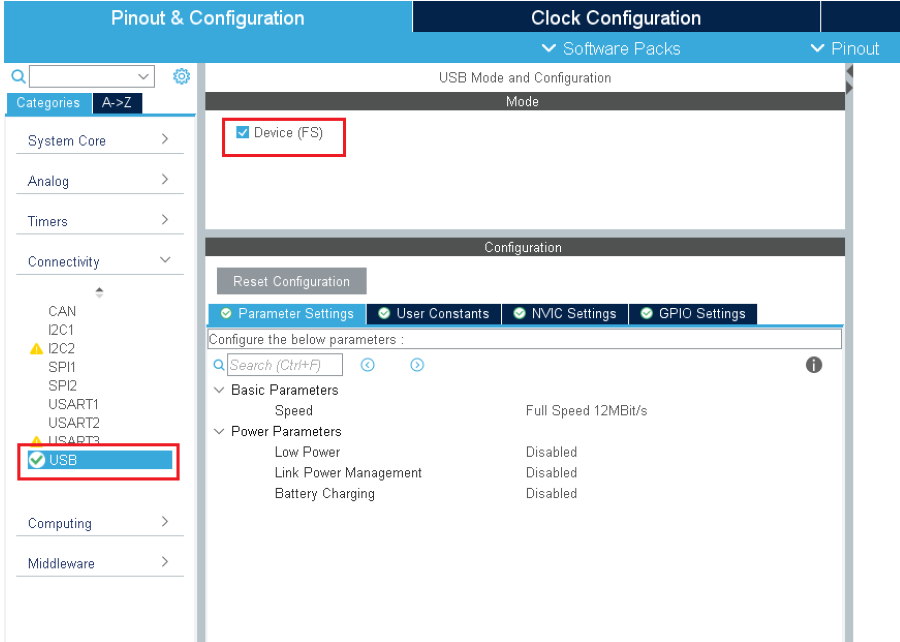
Then go to the Connectivity and click on USB, and check the Device (FS). This will enable the USB Device hardware on the MCU.
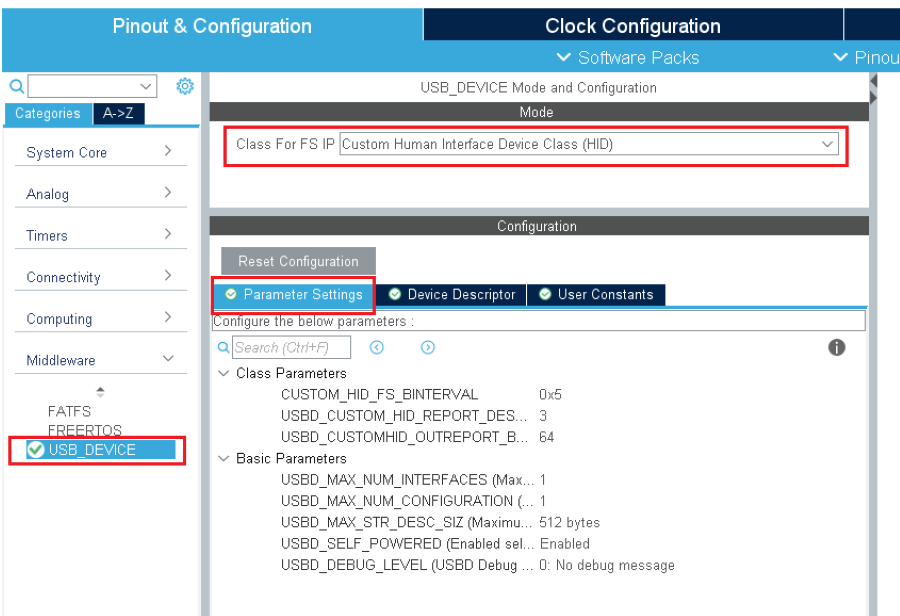
After that, go to Middleware and click on USB_DEVICE and then select Custom Human Interface Device Class (HID) in the Mode window. Now in the Parameters tab in the Configuration window, you can see some settings for HID class. And in Device Descriptor tab, some device descriptors like PID and VID are shown. We should change these settings but not at this point, because we need to make some changes in the generated source code, so we will set all those parameters later in the code.
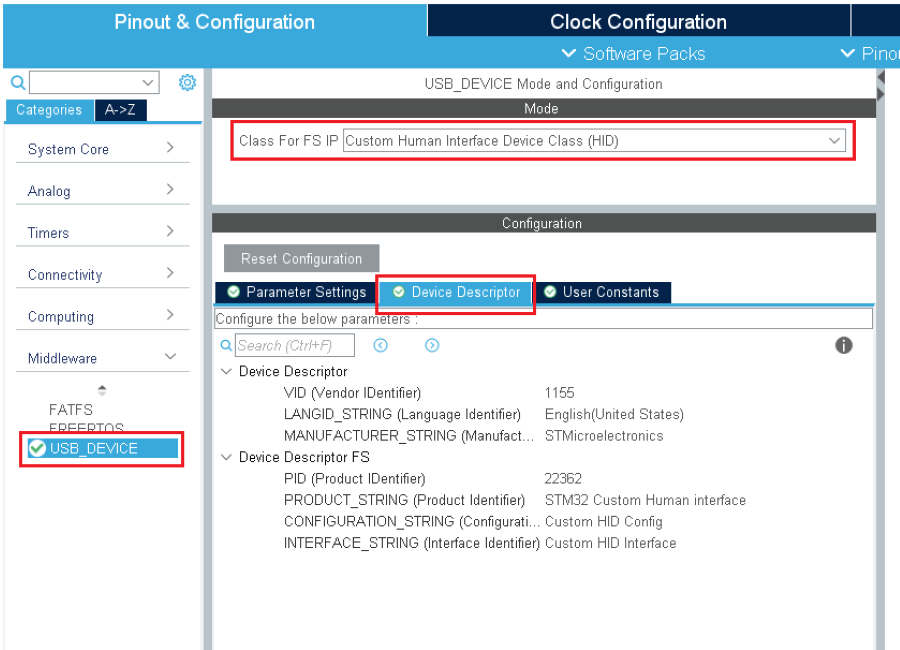
As we are going to control the onboard LED on the Blackpill, we need to configure the GPIO connected to the LED. It is PB12 which must be set as output. I also label this GPIO as ONBOARD_LED. Finally, choose a name for the project and select the IDE you wish to code be generated for – I use MDK-ARM – and generate the project.
Edit the project
Now, some changes should be made in the source code – some HID class source files. Be noticed that after changing the source code, you must not generate the project again from the CubeMX as it will replace the changed files with default ones. If you will have to regenerate the project, you’d better back up the Middlewares and USB_DEVICE folders in the project path before, and replace them after the project was regenerated.
The first thing to change, is the USB HID report descriptor called CUSTOM_HID_ReportDesc_FS which is found as an array in usbd_custom_hid_if.c. This array consists of two members by default. We should add some more data in this array and also change its length – USBD_CUSTOM_HID_REPORT_DESC_SIZE – in the file which it was defined. Following values should be added to the array.
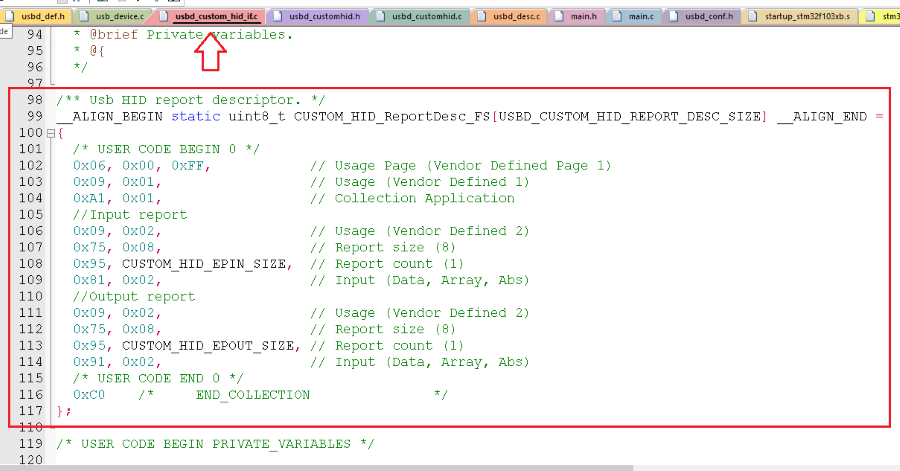
CUSTOM_HID_EPOUT_SIZE and CUSTOM_HID_EPIN_SIZE are the size of sending and receiving endpoint – number of data bytes we want to send and receive – and are defined in usbd_customhid.h, which can be up to 64 bytes.The maximum data size in HID class is 64 bytes per each request. We are going to send and receive all 64 bytes in each USB transaction although we are leave some bytes unused. So we set both to 64.
The size of CUSTOM_HID_ReportDesc_FS array becomes 24 bytes now, so we need to open usbd_conf.h and change USBD_CUSTOM_HID_REPORT_DESC_SIZE to 24.
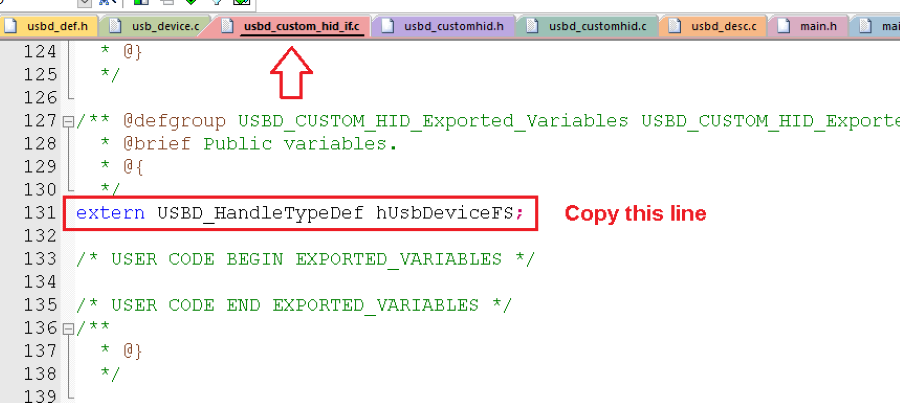
Then copy the line below from usbd_custom_hid_if.c and place it in main.c in “USER CODE BEGIN PV” section. This allows us to access this variable in main.c. We also need to define an array in main.c to put our data we wish to send to the host. Let’s name it usbTxBuffer and give it a length of 64 or CUSTOM_HID_EPIN_SIZE. You may need to include usbd_customhid.h for CUSTOM_HID_EPIN_SIZE.

Then open usbd_customhid.h and find USBD_CUSTOM_HID_ItfTypeDef. It contains a pointer to a function called OutEvent which gets two uint8_t arguments. These arguments should be changed with a pointer to a byte array (uint8_t*) so that the input data coming from the host could be passed in the function.

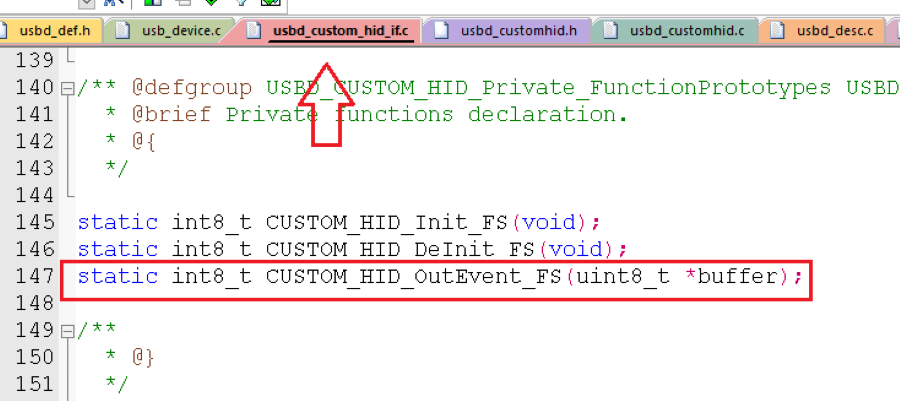
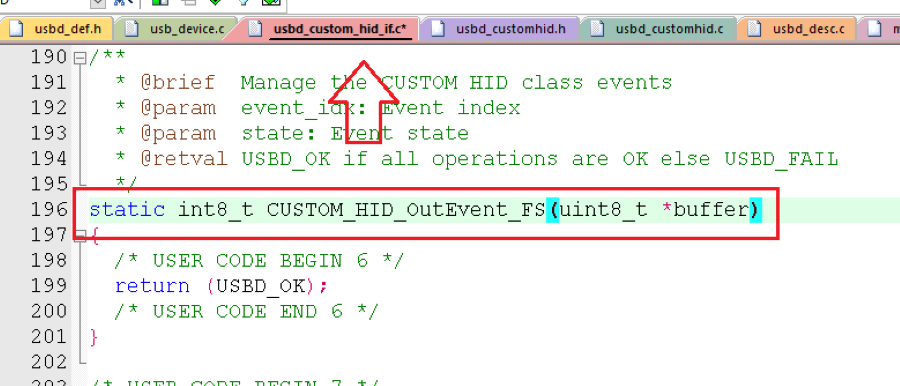
As we know OutEvent is a pointer to a function, so we also must change the function that OutEvent points to. Both definition and declaration are in usbd_custom_hid_if.c called CUSTOM_HID_OutEvent_FS. We should change their arguments like what we did on OutEvent as follows.
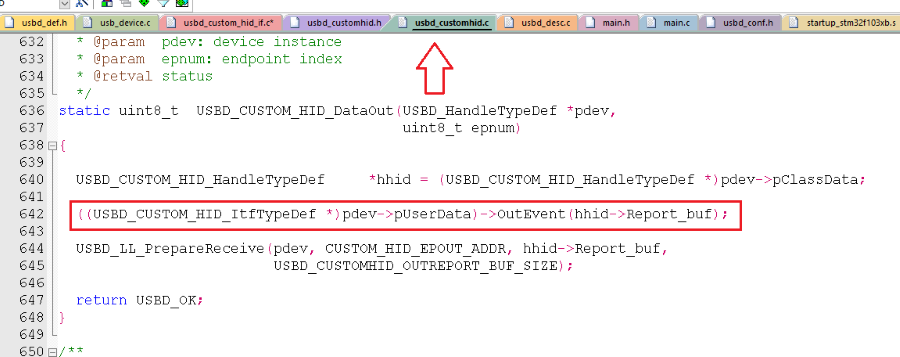
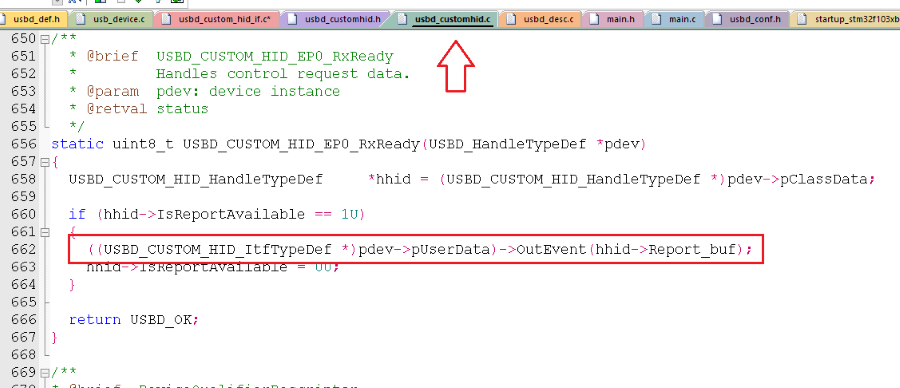
Then, in usbd_customhid.c, references to CUSTOM_HID_OutEvent_FS must be changed. There are two references in functions USBD_CUSTOM_HID_DataOut, and USBD_CUSTOM_HID_EP0_RxReady. Change them as follows.
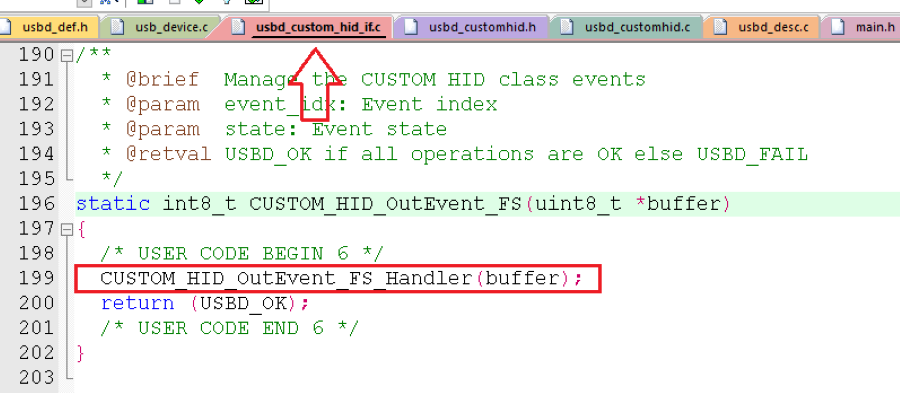
The function CUSTOM_HID_OutEvent_FS that we earlier changed its arguments to accept a buffer, is actually called each time data comes into the device. So data should be taken in this function. But it is better the piece of code for taking data not to be placed in this library file. The main.c sounds better, so we just define another function in usbd_custom_hid_if.c to be called in CUSTOM_HID_OutEvent_FS. So we define a function as follows and name it CUSTOM_HID_OutEvent_FS_Handler which have a pointer to a byte array argument. We use the keyword __weak here, which allowed us to declare this function once more in another file (main.c) and put our code in it to access incoming data buffer.
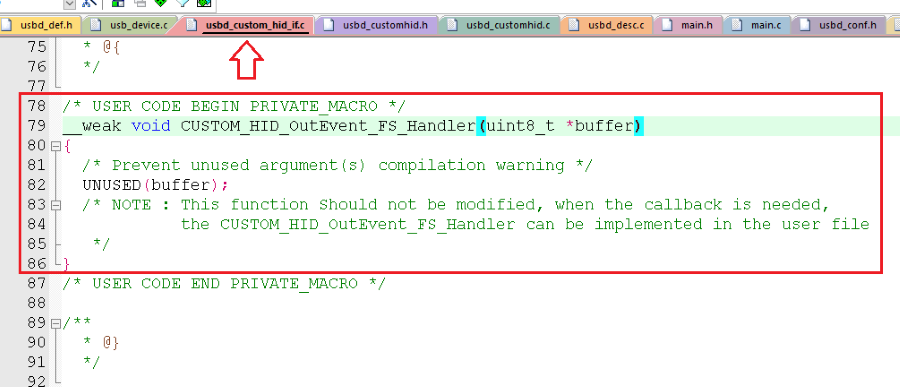
Then CUSTOM_HID_OutEvent_FS_Handler must be called in CUSTOM_HID_OutEvent_FS as follows.
Incoming data from the host is a 64-byte array which is sent by a software on a PC. The first byte defines the LED state. The value 0, 1, or 2 is possible for this field which means off, on, or blink respectively. The second byte, holds the MSB of an unsigned integer value and the third byte holds its LSB. This value is used as the interval in milliseconds when LED state is blink. Other bytes are not used and filled with 0. To achieve this functionality in Device MCU, CUSTOM_HID_OutEvent_FS_Handler must be implemented in main.c as follows.
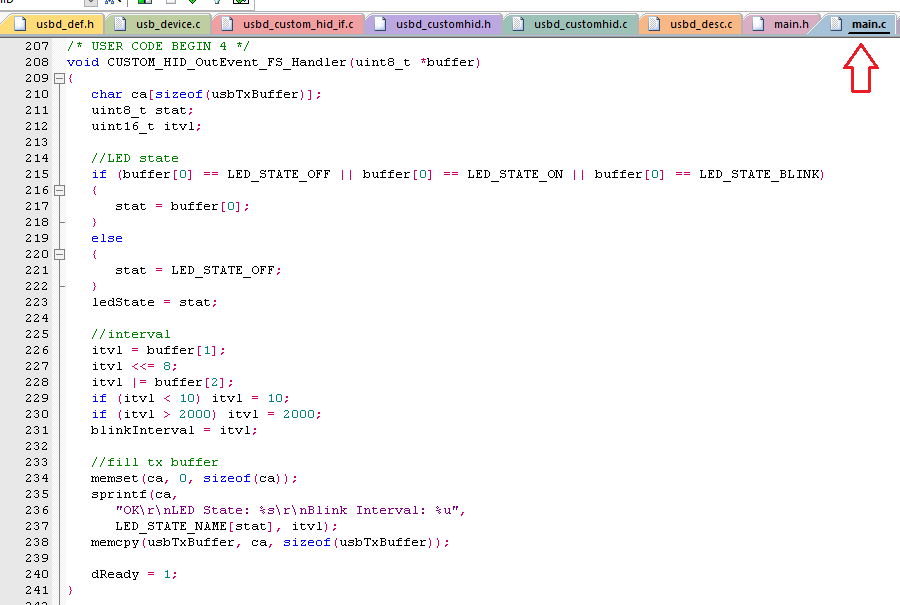
As you can see in this function, the LED state and interval value are assigned to other global variables (after validation) to be used in the main function loop. Also the variable usbTxBuffer is filled with a string containing new arrival settings. In the program infinite loop in the main function, the LED state and interval variables are used to control the LED, also the function USBD_CUSTOM_HID_SendReport is called after each time data reception to send back usbTxBuffer to the host.
You could also check usbd_desc.c file for device descriptor strings and IDs as shown below. You might want to change USB_PRODUCT_STRING_FS, but about the other ones, I think it is not a good idea as the OS may not recognize the device unless its parameters are registered.

Test the project
To test the project, build the project and download it into the MCU. Then connect the Blackpill to your PC on the USB port and run the Custom HID Tester software. As the software starts, it will look for an HID device with PID and VID equal to 1155 and 22352 respectively. As the device is found, the software shows the VID and PID numbers and says that is connected. Now, you can send settings by click on the send button and see what the device responds.

I’ve just uploaded the firmware main.c, main.h and Custom HID Tester exe files.
I hope this article helps you implement your custom HID class on your projects and enjoy.

